Laying a resin bound system is a straightforward process that can be completed by a professional contractor or as a DIY project. Explore our step-by-step guide to help you install resin-bound paving for your outdoor space, including the tools and equipment you’ll need for the job.
What is resin-bound paving?
Resin-bound paving is becoming an increasingly popular hard landscaping choice for outdoor areas, for both residential homes and commercial settings.
As a versatile, durable and attractive form of surfacing material, resin-bound systems are suitable for use in a wide range of applications, including:
- Driveways
- Garden paths
- Patios
- Outdoor entertainment areas
- Commercial areas for pedestrians and light vehicle traffic
With their strength, ease of maintenance and eco-friendly credentials (they’re 100% permeable when laid on a permeable bed), it’s easy to see why resin-bound paving is becoming an increasingly popular choice among landscapers and DIYers alike.
Choosing your materials
Choice is another great bonus of resin-bound systems.
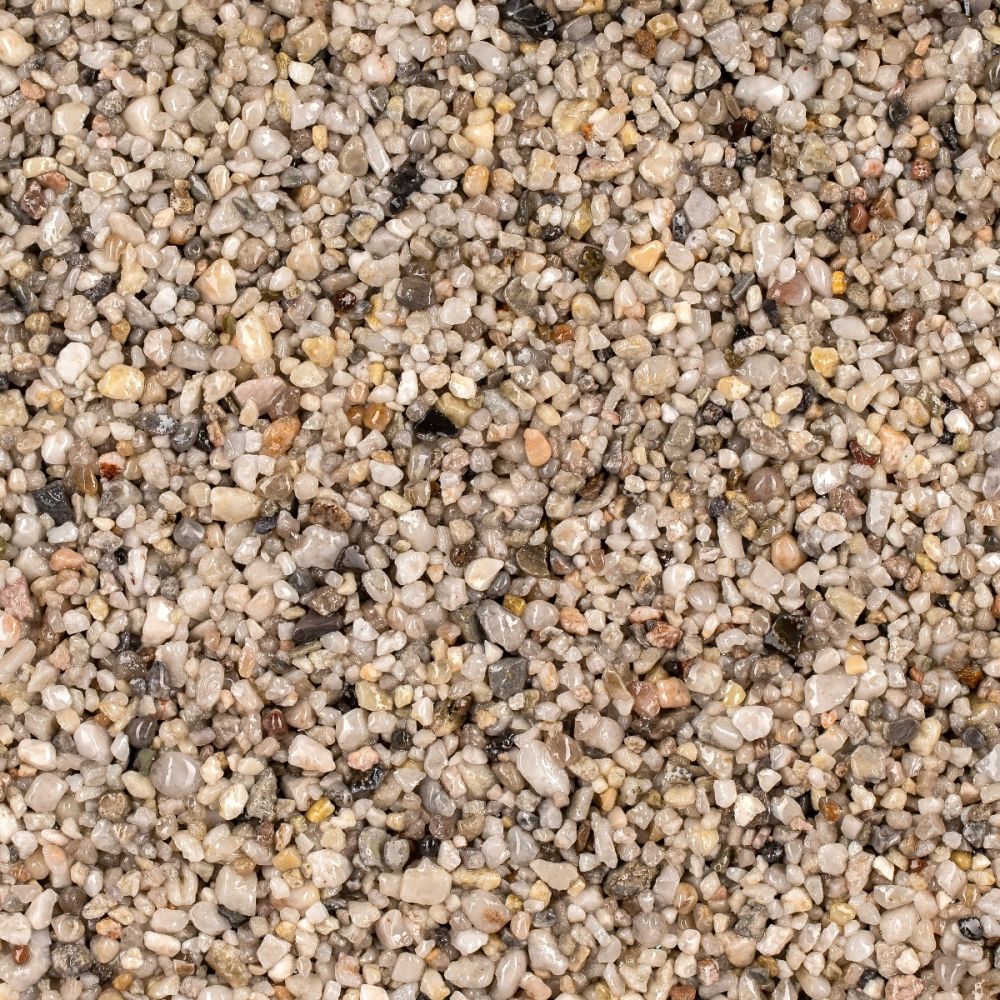
The range of decorative aggregates available is virtually endless, including pebbles, stones, marble, granite and even quartz. This choice allows you to match the aggregate with the style and design of your property, delivering a unique and distinctive look.
Use your own gravel or stones
Although some manufacturers of resin systems carefully choose the size and shape of aggregate, you can opt for using your own gravel or stones and mixing it with a quality resin and hardener.
One great example is the resin binder set from Vuba. This set contains both the resin (Part A) and the hardener (Part B) that can be combined with stones of your choice.
However, we don’t recommended throwing any old stones into the mix. The aggregate must be completely free of dust and debris, and completely washed and fully dried before combining with resin.
Use a resin kit that includes aggregate
Opting for aggregates specially chosen for a resin-bound paving does have its benefits.
For example, these DIY kits from Vuba contain enough aggregate and binder for 1m2 coverage, allowing you to easily measure-up and plan for how many kits you need (this is also important as it’s best to lay the whole area at the same time).
Vuba meticulously wash and dry the aggregate to ensure there’s no dust or debris included in the finished resin surfacing.
What’s more, after 30 years in the trade Vuba has also developed and enhanced the stones they use in their formulas. Rather than single-sized aggregate, they now incorporate a range of stones of special sizes and grades.
This aggregate variety offers perfectly suited angularity for bond strength. Maximum compaction is also achieved through a distribution of different sizes throughout the surface.
Tools and equipment you'll need
One of the great things about laying resin-bound gravel is that you don’t need as many specialist tools for the job.
When laying resin-bound paving, you’ll need:
Plasterer’s style drill and mixing paddle
Large bucket (between 25 and 30 litres)
Gauging trowel
Flooring trowel
Float
During application, have a suitable cleaning agent for tools nearby as the best results are achieved with clean trowels. Be aware that resin is not tolerant to moisture before setting, so ensure the cleaning station is well away from where you are installing the paved area.
Guide to installing resin surfacing
Follow these steps for a guide to installing resin surfacing.
This guide is based on installing Vuba’s DIY Kit for resin-bound paving. We recommend always reading the manufacturer’s instructions of the kit you purchase.
Step 1: Measure the area
Accurately measure the area to determine the amount of resin and decorative aggregate you will need.
As a general rule of thumb, a resin bound system should be 15mm thick or more. Check the manufacturer’s technical datasheet and make sure you have enough materials to achieve the thickness they specify for the area you want to cover.
If using the 1m2 DIY kits, ensure you have enough kits to cover the required area. That way, you’ll have a fully seamless finish.
Step 2: Prepare the sub-base
Before starting the laying process, it’s important to prepare the area.
You must lay the resin-bound paving on top of a hard, stable sub-base. This could be a concrete, tarmac or a stable paving base. If you don’t have a stable base then use a cellular grid with MOT (read on for info about the permeable VubaGrid).
The sub-base must be free from debris before installing the resin system.
If you’re laying the resin aggregate on a cementitious substrate, apply an acrylic concrete primer such as Easiprime.
This primer will seal and remove porosity in the concrete substrate and help to generate a strong chemical bond between the sub-base and resin-bound screed.
Important note for permeable systems
As most resin-bound systems are 100% permeable, you’ll need to ensure the sub-base is also permeable for a SUDS compliant system.
Either use open-grade asphalt as the sub-base or install a heavy-duty cellular paving grid that holds loose gravel in place, preventing rutting and displaced aggregate.
VubaGrid is a cellular paving grid that prevents gravel slippage on patios, driveways and paths, and also creates a solid and fully permeable foundation for resin-bound paving.
Grids will need to be filled with angular stone. Use a wacker plate to consolidate the grids and aggregate, and top-up as necessary.
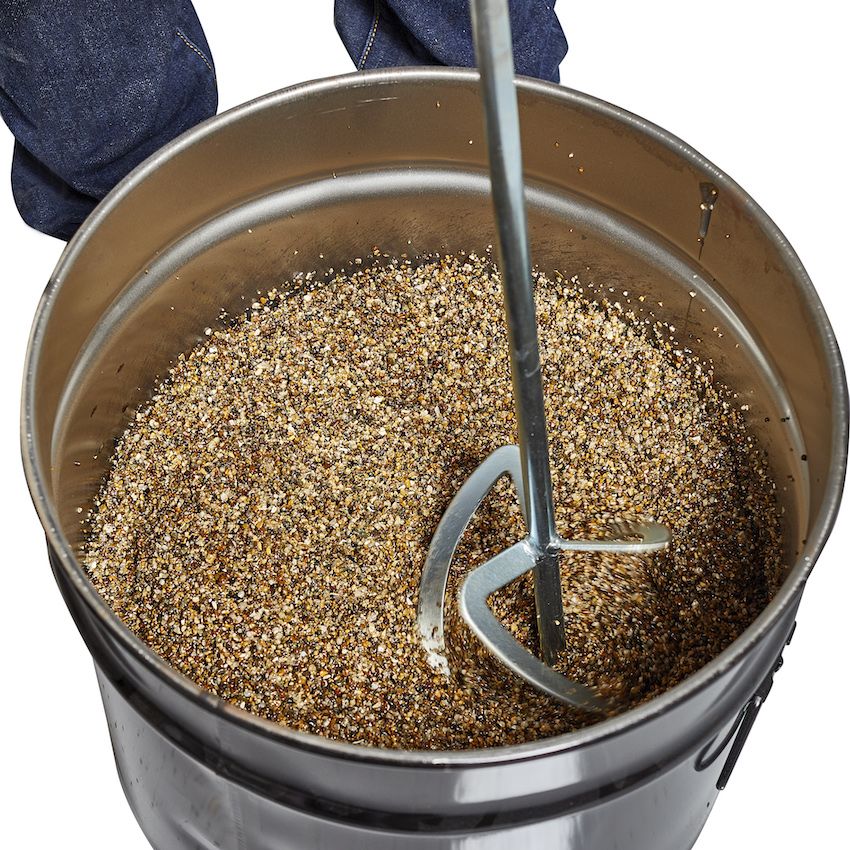
Step 3: Mix the resin, then add aggregate
Using the paddle mixer and large drill on a slow speed, combine the resin and hardener in the large bucket until they are fully blended into a uniform mixture.
Avoid over-mixing as this will generate heat and reduce the working time.
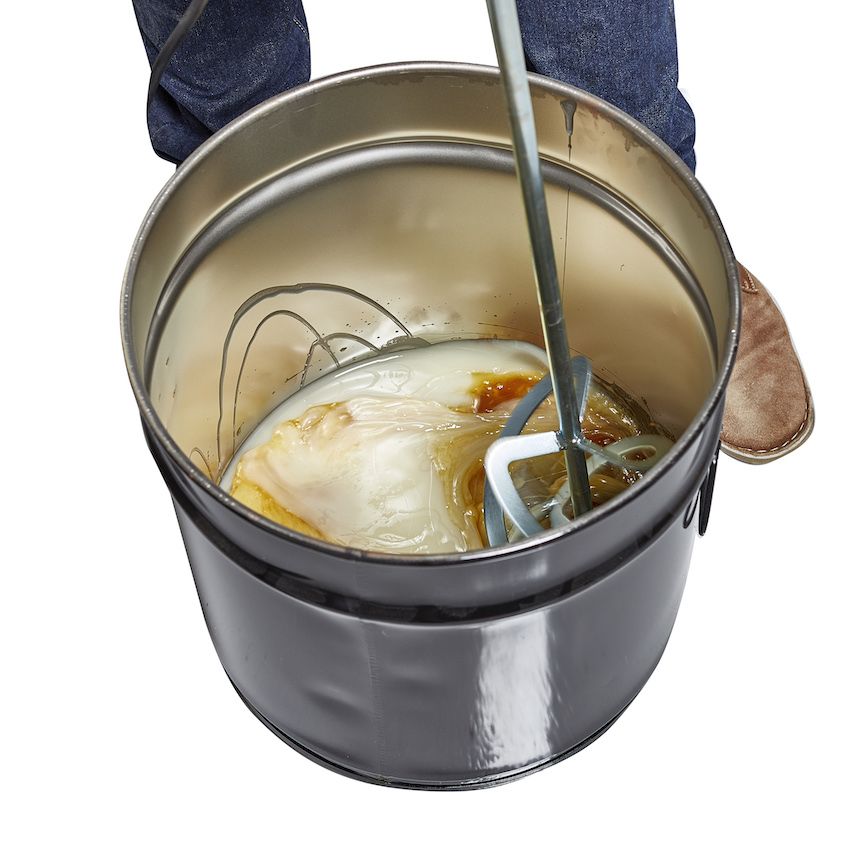
Once the binder is ready, slowly add the aggregate whilst still using the paddle mixer. Combine for 2 minutes until the resin fully encapsulates the stones.
Always mix one bag at a time. Use consistent mixing times for each batch to prevent patchy colouring or shading.
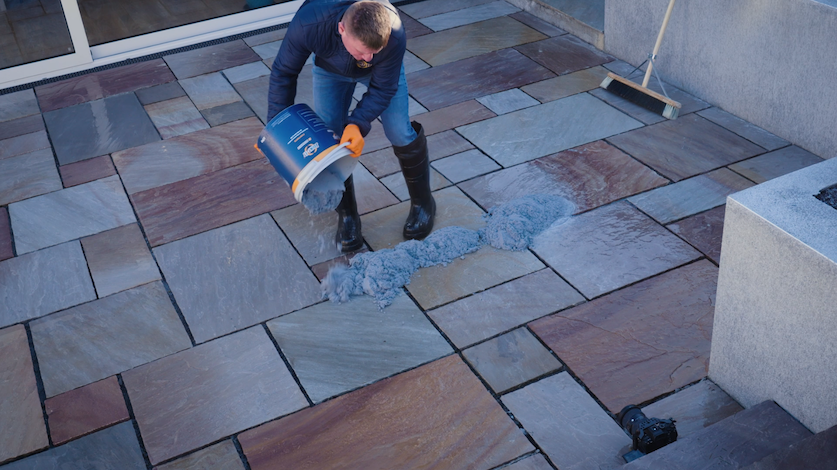
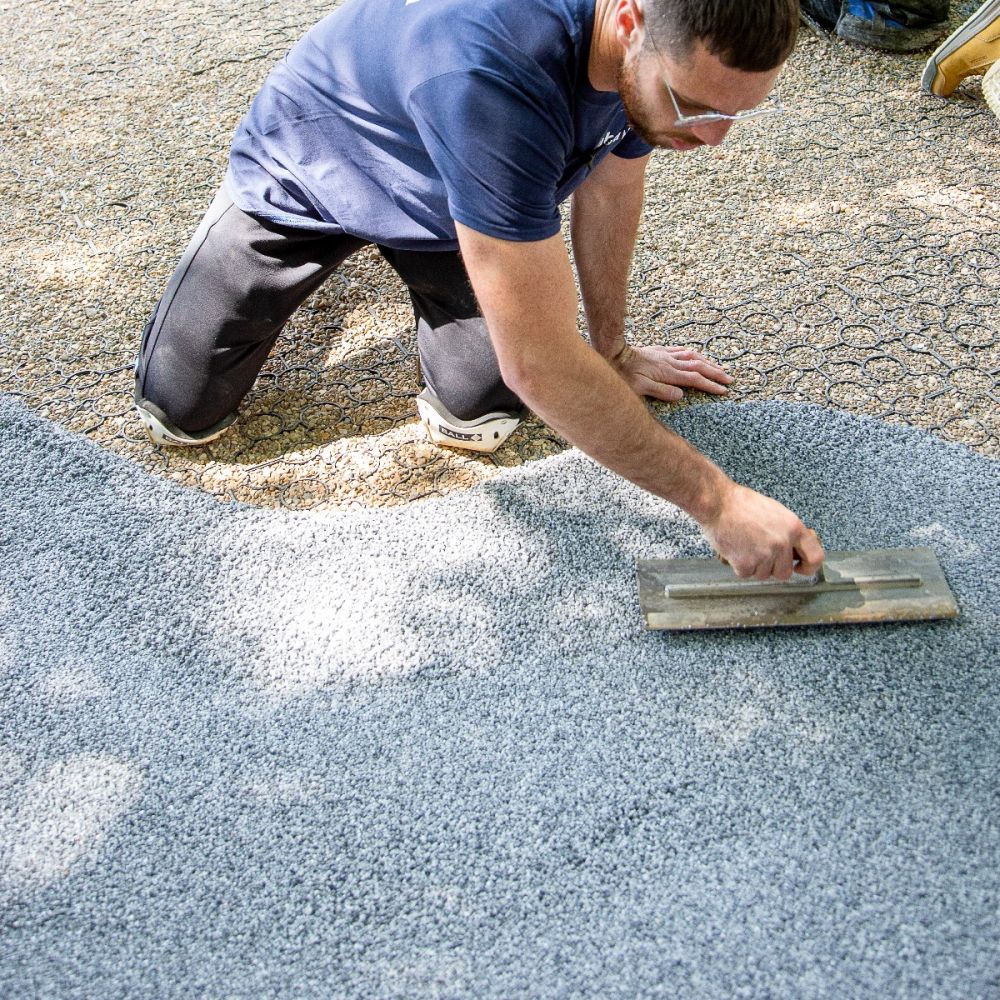
Step 4: Spread the aggregate mixture
Once the resin and aggregate is mixed, apply the mixture to the sub-base or grid using a trowel, finishing the surface with a suitable float.
Make sure the new surface is compacted to prevent stones from loosening or spreading. Compact the resin surfacing material at right angles, applying pressure as you pull back the trowel.
Once you’re happy with the finish, follow the steps again from start to finish for adjacent areas. It is important to maintain a ‘wet edge’ between mixes to allow the areas to knit together for a seamless system.
Step 5: Allow to cure
Finally, allow the resin mixture to cure for the recommended amount of time.
It can take up to 14 days for resin-bound paving to fully cure. However, the surface will be safe to walk on after 24–48 hours.
Please note, it’s best to wait until the surface has fully cured before repositioning any furniture – such as tables and chairs – that may cause high point loading.
Frequently asked questions
It depends on the system you use. As an established manufacturer of resin-bound systems, Vuba offers a 15-year warranty on their products. But when installed correctly, you can expect the paving to last for 20–25 years.
The weather should be mild and certainly dry when installing resin-bound paving. Between 5ºC and 25ºC is ideal. Make sure you check the weather forecast before starting your project and ensure no rain is due.
Curing time will also be affected by the weather. During summer, the surface may take only 24 hours to cure until it’s safe to walk on it. Over winter this may stretch to 48 hours.
Please note: it can take up to 14 days for resin-bound paving to fully cure. If you are looking to place furniture on top of the paved area, be sure to wait until the surface has fully cured.
It’s very easy to clean resin-bound paving, especially when compared with other types of paving. Just use a jet wash to clean the surface.
Resin encapsulated stones don’t hold the dirt like porous block paving and concrete. And because water drains right through this style of paving, no moss or algae will develop on the surface.
Vuba’s DIY resin-bound kits can be used for paths and outdoor patio areas, but are not suitable for driveways.
There are specialist kits that can be used for driveways. Get in touch with our team on 0330 122 1025 for more details and a bespoke quote.
At The Paving Experts we offer great bulk deals to landscapers and contractors working on larger projects.
Get in touch with our family-run team on 0330 122 1025. Deliveries can be made to your home or site, throughout mainland UK.