Wondering whether to use a resin grout for your new patio? Armed with incredible strength and superb resistance to stains, epoxy resin grouts are often the ideal choice for driveways and low-maintenance paving. Explore all the benefits of patio resin grout – and how easy they are to apply – in this DIY guide.
Plus, for those needing a permeable grouting solution, epoxy grouts such as ProJoint Titan and Joint-It Dynamic are permeable and easy for anyone to apply. Read on to see how these robust grouts hold-up as an eco-friendly choice for reducing flooding and topping up the water table.
Understanding patio resin grout
Epoxy resin grouts (sometimes simply referred to as resin grouts) are high-performance jointing compounds that are used on patios and paving projects. Typically, they are made up of a two-part epoxy resin and hardener, which is mixed with a special aggregate sand to form the grout.
More than just a filler, these heavy-duty patio grouts are known for their exceptional strength and toughness, together with their hardy resistance to stains, weed-growth, algae and ultra-violet rays.
While more traditional grouts degrade over time, resin grouts are built to last.
Historically, professional landscapers and paving experts alone utilised epoxy exterior grouts.
But today, more and more homeowners are discovering the benefits of these extra-strength jointing compounds and, quite simply, how easy it is to use them.
Here are the main reasons homeowners choose a patio resin grout:
- Incredible durability for solidly built paving
- So strong it will withstand heavy loads – for some, up to 10 tonnes
- Easy for anyone to install – minimum effort and equipment required
- Resistant weeds, mould, algae, water, frost, chemicals and UV rays
- Low ongoing maintenance
- Eco-friendly: many are fully permeable allowing surface water to drain through
Read on to discover why epoxy grouts are a solid choice for driveways. We also cover the few grouting tools you’ll need when applying resin grouts (tip: many are found in most sheds!) and a run-through of exactly how to apply these hard-wearing jointing compounds.
Is epoxy grout good for patios?
Epoxy resin grout is an excellent choice for a low-maintenance patio. Made from extra-strong resins, fillers and glue, these permeable grouts are made to withstand vehicle traffic without cracking or breaking.
While many epoxy resin grouts allow water to drain through, the hardened waterproof formula makes them virtually impervious to weeds, mould, algae, chemical stains and frost, and the best grout to use for outdoor projects.
The choice for permeable patios
Importantly for UK homeowners, new driveways now need to be permeable to comply with sustainable drainage (SUDS) regulations.
The reason? It’s all to do with limiting the deluge of surface water that flows into our rivers, streams and drains following periods of heavy rainfall.
Essentially, the more patios and gardens that can soak-up excess surface water, the fewer flooding events we will experience. Furthermore, more natural soakaways benefit our water resources by topping up groundwater supplies.
When constructing a new impermeable driveway, the homeowner must seek planning permission from the local council. This can be a lengthy process, slowing down the completion of your front garden. It may even trigger extra building requirements.
Fortunately, there are plenty of ways of making a driveway or patio permeable.
Yes, choosing permeable pavers is one way to go.
But an easier fix is installing a permeable bedding layer below the pavers and permeable grout between them. That way, the water can easily soak into the ground below.
Patio resin grout: strong enough for driveways
Most permeable grouts are sand-based and don’t have the strength to withstand the weight and pressure of vehicle traffic.
This is where epoxy exterior grouts really come into play.
Epoxy jointing compounds such as ProJoint Titan and Joint-It Dynamic have been formulated to be used on both impermeable and permeable patios.
These two versatile grouts contain glues that are so strong they allow surface water to drain through the joints. All you need to do is lay the patio on a fully permeable bedding layer, for example, using Perma-Bed bedding mortar.
Important note on patio loads: alongside choosing a grout with a suitable load capacity, you’ll also need to choose a bedding mortar that can withstand the expected maximum load for the patio.
How to apply patio resin grout
Here’s a simple DIY guide to applying patio resin grouts to show you how easy it really is.
When grouting with a resin grout, the most important thing to remember is not to allow the pavers to dry-out during application. We recommend having a buddy on-hand with a hose pipe to keep the area damp.
We’ve used the instructions for ProJoint Titan as an example. Although most resin grouts are applied in a similar way. Always check the latest manufacturer’s instructions.
Equipment for resin grouts
Only basic paving equipment is required when using resin grouts like ProJoint Titan and Joint-It Dynamic:
- Long-handled broom with soft bristles
- Leaf blower
- Hosepipe with spray nozzle
- Plasterers’ whisk
- Long-handled rubber squeegee
- Trowel or finishing bar (optional)
Here are the eight easy steps for grouting with ProJoint Titan. See the guide to using Joint-It Dynamic for more resin grouting instructions.
Step 1: Prepare the patio and joints
With the paving stable and firmly secured (a slurry primer is a must when using any grout), sweep away any dust and debris from the patio paying special attention to the joints. Ideally, use a leaf blower to remove any particles from the gaps between each slab.
Step 2: Wet the surfaces
Then, thoroughly wet the paving so the water has time to soak into the surface. Use the leaf blower again to remove excess water that has collected within the joints.
Step 3: Combine the ingredients
Next, remove the bottle of hardener from the tub. Opening it carefully, empty the full bottle into the resin/sand mix. Using a plasterers’ whisk, combine the mixture for 3 minutes, or until it becomes a free-flowing slurry.
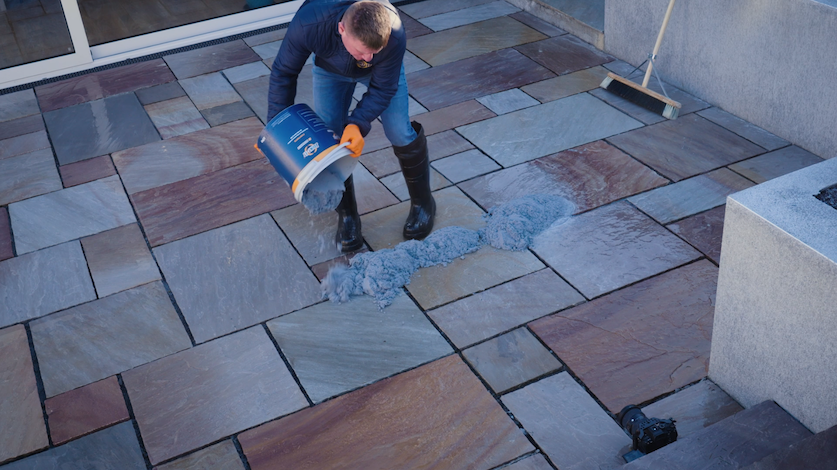
Step 4: Apply the mixture
Ensuring the paving is still wet (if not, lightly spray/mist again), empty the epoxy resin grout directly onto the patio. Using the rubber squeegee, fill the empty joints completely.
Step 5: Wait a few moments
Once the joints are filled, leave the mixture for 5 to 15 minutes while the foaming in the slurry disappears.
Step 6: Sweep away the excess
Using a wet medium soft brush at a 45° angle to the joints, sweep away the excess sand to leave the patio clean. Do this multiple times before the grout cures so that any remaining residue does not set on the surface.
Do not add any extra water at this stage.
Step 7: Compact the joints (optional)
This step is based on personal preference. Because ProJoint Titan epoxy grout is so fluid, you really don’t need to compact the joints. But if you do prefer a more traditional compacted joint, use a trowel or finishing bar once the mortar has begun to cure.
Step 8: Leave the grout to fully cure
Allow time for the grout to fully cure.
Extra tips for using ProJoint Titan
A few extra tips for when using ProJoint Titan:
Just like Joint-It Dynamic, ProJoint Titan can be used on both permeable and impermeable beds, make sure you have used the right bedding mortar (permeable or impermeable) for what you want to achieve.
For ProJoint Titan, paving joints must be a minimum depth of 25mm. The minimum joint width when using Titan is 5mm.
Also, as with most grouts, the outdoor temperature should be between 3°C and 25°C during installation. Be aware, when working with dark paving in direct sunlight the temperature of the surfaces will soar. In these instances, it’s best to avoid warm days completely.
Before you go...
While this guide to patio resin grouts has been compiled for accuracy and the best of our expert knowledge, from time to time formulas and application instructions can change.
Always read the product’s full instructions before installation. It’s also good practice to check the technical datasheet (send us a quick email to ask for one) to make sure that the grout can be used with your chosen paving materials and joint sizes.
If you have any questions about epoxy resin grouts, installation tools and techniques, please get in touch with our team of paving experts on 0330 122 1025.


