Kiss uneven tiles and pavers goodbye by investing in a simple and affordable tile levelling kit. See how tile spacers and levellers are essential tools for anyone working with slim tiles to achieve perfectly flat and even surfaces, and find out exactly how to level tiles like a professional.
One of the tell-tale signs of a bad tiling job is an uneven surface between tiles, with what we call in the industry ‘lippage’.
Lippage is when a tile is not level with the tile next to it, creating a lipped effect as the vertical edge or corner of the tile sticks out. These uneven surfaces can be quite unsightly and certainly the hallmarks of a poor tiling job.
But lippage can be a much more serious problem when it exists between flooring tiles or pavers. In fact, even just 1mm out of alignment can cause a major tripping hazard and the whole tiling or paving job may need to be torn up and redone.
Why does lippage occur with slim tiles?
When working with slim tiles made of porcelain, marble or stone, it is near-on impossible to create a flush surface across the entire surface the without some extra assistance. The reason? These types of lightweight tiles lack the heaviness of other tiling materials.
With heavier, thicker tiles, the weight of the tile will help to secure the material neatly on top of the adhesive.
With more lightweight tiles, a tiler will find themselves using a rubber mallet to try and attain the right alignment, and in many cases to no avail.
This is where tile levelling kits come in so you can space and align tiles consistently across a whole surface with no lippage.
What are tile levelling kits?
Tile levelling kits are packs of spacers and levellers used for installing between each tile to create uniform spaces and level surfaces.
The kits themselves contain 100 or more spacer bases and leveller twisting caps or wedges. In many cases, the twisting caps or wedges can be reused for other tiling or paving jobs.
Tile levelling kits are for both wall and floor tiles. Most kits can also be used for outdoor landscaping, particularly when laying thin porcelain tiles of 20mm thickness.
When buying a kit, purchase one that suits the thickness of the tiles and the size of the joints between each tile.
Tile Levelling Starter Kits
The following starter kits contain enough tile spacers and tile levellers for creating smooth and consistent joints and surfaces.
See the table below for a more detailed comparison of each of these kits, plus an outline of the spacers and spinning caps that are sold separately.
Are levelling tile spacers worth it?
Given the huge expense of having to redo a botched tiling job – not to mention the massive waste of time that will be – a levelling tile spacer kit is certainly worth the minimal investment that it costs.
Quality tile levelling kits cost between £35 and £60. Always look for kits with levelling caps or wedges that can be reused on subsequent jobs.
If you’re a tiling or landscaping contractor, you may need to purchase a range of spacers for the variety of joint sizes you will work with on different jobs, i.e. for 1mm, 2mm, 3mm, 4mm and 5mm joints.
Tile spacers vs tile levelling spacers
Tile spacers are the small plastic crosses that fit between the corners of each tile to create a consistent gap across the entire surface area.
Although tile spacers are common in most contractor kits, tile levelling spacers can be seen as the next level in nifty gadgets: they not only space the tiles consistently but also help you ensure that the tiles are perfectly flat with no lippage.
If you have the option, we suggest investing in tile levelling spacers and especially when working with slim flooring tiles.
Are wedge tools or spinner caps preferred?
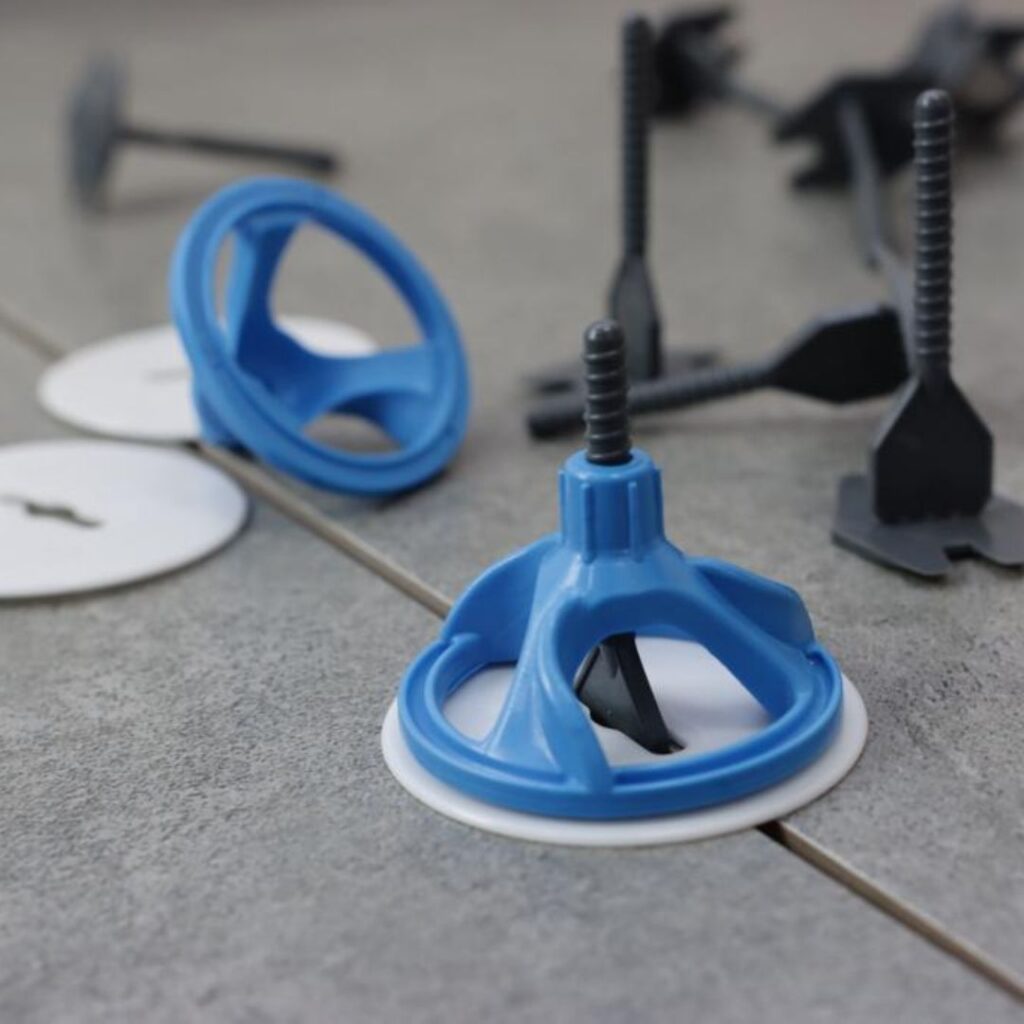
There are two main types of levelling tools: wedge levelling tools and spinner caps, which are sometimes called spin doctors.
Wedge levelling tools involve sliding a plastic wedge into the base clip and adjusting with pliers to secure the wedge tight into the base. Together, the wedge and base push down any high edges to make a flat surface across the tiles.
Spin doctors involve screwing a plastic cap into the base secured between two tiles. Simply rotate the cap until it is flush with the two tiles to create a seamlessly flat surface.
Spinner caps are often hollowed out so you can easily see the joints between the tiles. Alongside how easy it is to use the spinner caps, this is another reason why spinner caps are so popular with tilers and landscapers.

Do professional tilers use spacers?
Absolutely. Even the most experienced tiler will use spacers and levelling tools. There is no shame in having some extra assistance to ensure each project is created to perfection.
Tile spacers and levelling clips are in fact a common hack used by professional tilers and landscapers to ensure there are no signs of lippage or any protruding vertical edges on a tiling job.
Perfectly flat surfaces are a professional standard. They are especially important when laying slim flooring tiles where even the slightest bit of lippage can create dangerous trip hazards.
Best tile levellers to use
Big Spin Hurricane tile spacers and caps
From the team at TileRight, the Big Spin Hurricane spacers and caps are a great choice for creating smooth and consistent surfaces every time.
Starter kits come complete with a handy carry tub and provide everything you need for a job.
Tile spacer bases (for a variety of tile depths and joint widths) and additional leveller caps can be bought separately.
Prices start from £25 excluding VAT.
| Product & joint width | Tile depth | Quantity |
| Starter kit for 2mm joints | 3mm–15mm | 50 reusable caps + 150 spacer bases |
| Starter kit for 4mm joints | 15mm–25mm | 50 reusable caps + 150 spacer bases |
| Starter kit for 5mm joints | 15mm–25mm | 50 reusable caps + 150 spacer bases |
| Spacer bases for 1mm joints | 3mm–15mm | 250 spacer bases |
| Spacer bases for 2mm joints | 3mm–15mm | 250 spacer bases |
| Spacer bases for 3mm joints | 3mm–15mm | 250 spacer bases |
| Spacer bases for 4mm joints | 15mm–25mm | 250 spacer bases |
| Tile Leveller Caps | Not applicable | 100 reusable caps |
VITE Levelling Kit from Raimondi
Raimondi’s VITE levelling and spacer kit is another valuable piece of kit for installing porcelain, natural stone and manmade tiles and pavers.
This tool-free tile levelling system can be used with tiles and pavers between 14mm and 26mm thick. The threaded cap is easy to tighten and loosen with no annoying cross threading.
The VITE starter kit is ideal for 20mm porcelain and is a preferred option for landscapers.
The pack includes 100 reusable caps, 300 clips and 200 spacers for 5mm joints.
Are tile levelling clips reusable?
While we can’t speak for all tile levelling systems, the caps used in the systems mentioned here are all reusable.
The spacer bases are not reusable and will remain between each tile after grouting.
How to level slim tiles and pavers
It’s important to note that tiles must always be laid on a level surface. Tile levelling tools exist to create a consistent and flush surface across slim tiles that are otherwise extremely difficult to align. Use a suitable floor leveller to prepare the surface for tiling.
Follow these general guidelines for creating perfectly aligned and perfectly spaced tiling without any lippage:
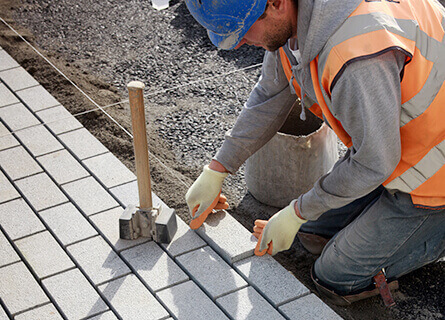
- Spread the paving or tiling adhesive onto the level surface and lay a tile as normal
- Slide a tile levelling clip or base below the tile, allowing the base to sit flush with the tile
- Continue to add more tile levelling clips or bases to the other sides of the tile that will be adjacent to other tiles (for longer tiles, you may use up to six clips or bases per tile)
- Lay a neighbouring tile
- Twist the spinner cap onto the threaded base until it is flush with the two tiles
- Continue to lay more tiles and install the spinner caps on each of the bases
- Allow the paving or tiling adhesive to cure
- Once you are ready to grout, kick the disposable clips away to create a clean grout joint (you could instead use a rubber mallet)
- The reusable caps can then be saved to use on another tile levelling job