New to Flowpoint and want to know exactly how to use it? Read the comprehensive guide full of expert tips from the landscaping industry on how to apply Flowpoint slurry grout for the best results.
About Flowpoint slurry grout
Flowpoint is a popular rapid-setting grout with professional landscapers and paving specialists, and used on a vast array of commercial and domestic projects up and down the country.
One of the main reasons for Flowpoint’s popularity is the extra reassurance it offers to contractors, project managers and homeowners that their paving projects are built to last.
Flowpoint slurry grout meets and exceeds the British Standards BS7533, a valuable seal of approval that sees the grout – and related products – going through a strict series of checks and tests.
In fact, when applied according to the instructions and recommendations, this robust paving grout can last up to 40 years without the need to regrout.
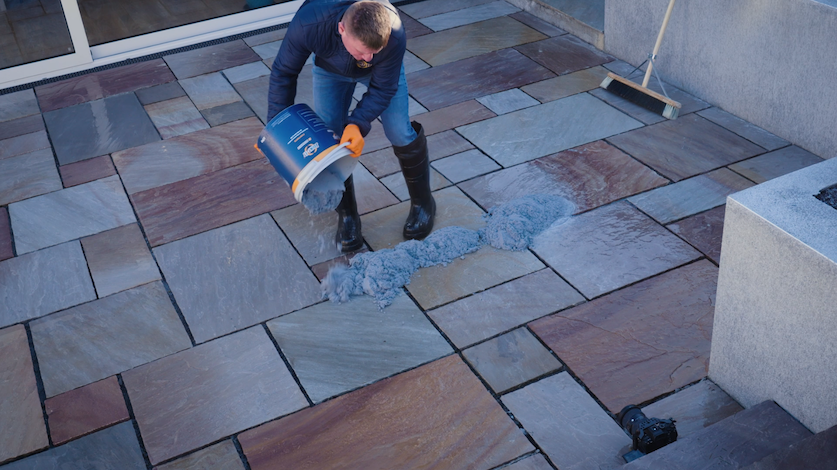
As a cement-based, impermeable grout, Flowpoint is applied as a wet slurry to fix paving materials in place and prevent weed growth between the slabs.
We mentioned before that this grout is rapid-setting. Flowpoint can set within as little as 15 minutes at 20ºC and is ready to be cleaned after 30 minutes. After one hour, you can walk on the paving surfaces. Four hours and the area can receive car traffic. Now that’s a fast installation!
Flowpoint is easy to use and apply once you know how. All it takes is a little knowledge and advice.
Read on to discover the top tips for applying Flowpoint.
What formula variations are available?
Before we get into the nuts and bolts of how to apply Flowpoint, it’s important to be aware of the variations in the formula.
Flowpoint variations:
- Flowpoint Standard is for most paving jobs from 5mm joint widths
- Flowpoint Smooth is for narrow joints and porcelain paving from 3mm joint widths
- Flowpoint ECO is for projects that require extra environmental kudos
- Flowpoint Fine offers a contemporary finish from 2mm joint widths (ideal for porcelain)
Each of these formula variations are available in two colours: choose from either natural grey or charcoal.
Compare the aesthetic differences between each of these grades and colours.
How to apply Flowpoint grout
Here you’ll find all the recommended advice on how to apply Flowpoint slurry grout from experts in landscaping from across the country.
Please note, if you are using Flowpoint Fine, there are slight adjustments to the ratio of water needed. We’ll include these variations in these instructions, but you may want to read the full article covering how to mix and apply Flowpoint Fine.
If there’s anything you’re unsure about while reading this how-to guide, get in touch with our family-run team on 0330 122 1025 or post your question below.
If you are looking to switch your business’s paving grout to Flowpoint, we have a close working relationship with Ultrascape and may be able to arrange an in-person demo for your team.
Be aware, a professionally finished and long-lasting project is not just about using a quality paving grout. It’s also dependent on the quality of your bedding layer, whether you have created a full-contact mortar bed and whether you chose to use a quality primer.
We’ll first cover the necessary steps for applying Flowpoint. But be sure to read the extra tips below on creating the foundations of a paving project that lasts up to 40 years.
Step 1: Clear the surfaces and joints
After you’ve created a full-contact mortar bed and primed the full underside of your pavers (read on for how to get the most from Flowpoint for more details), you’ll need to ensure the surfaces are in good order for grouting.
Clean the pavers and joints to ensure they are free from debris.
If it has recently rained, you’ll need to make sure the joints don’t contain any pooled water as this could compromise the formula and lead to staining or efflorescence.
Using a leaf blower is a quick and easy way of removing any excess water.
Expert tip! Pack the perimeter joints of the pavers that you are grouting to prevent the slurry grout from ‘running away’.
Step 2: Pre-soak the joints and surfaces
Next you’ll need to dampen the paving surfaces and joints.
Using a hose on a spray setting, lightly spray the area to ensure it’s damp.
Damp surfaces and joints will make the application process so much easier and also helps to ensure that when you apply the grout it doesn’t stick to the surfaces.
Now I know we said to remove pooled water – and this is an important difference. You want a damp area, not a saturated area with puddles or pooling.
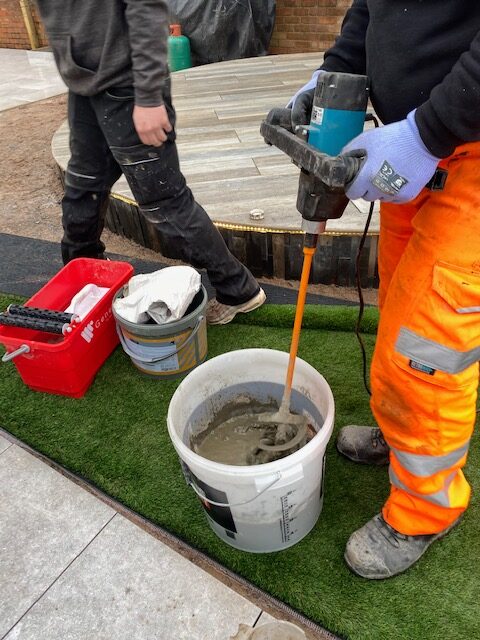
Step 3: Mix the Flowpoint formula
Now you’re ready to get the formula mixed. As a rule of thumb, always add the specified amount of water to a clean bucket first before adding the formula itself.
If you are using Flowpoint Fine, add 3.4 litres of water to a bucket before pouring in the 20kg formula.
For all other Flowpoint grades, add 4.25 litres of water to a bucket for each 25kg bag of Flowpoint.
Always check the manufacturer’s technical datasheet beforehand to make sure there have been no changes. A copy of this can be requested by emailing orders@thepavingexperts.co.uk or calling 0330 122 1025.
As soon as you’ve added the formula, mix for 3–5 minutes using a force-action mixer or paddle mixer. You are looking for a consistency that is smooth and free of lumps, similar to a cake batter.
Be sure not to extend the mixing time as this will accelerate the setting process.
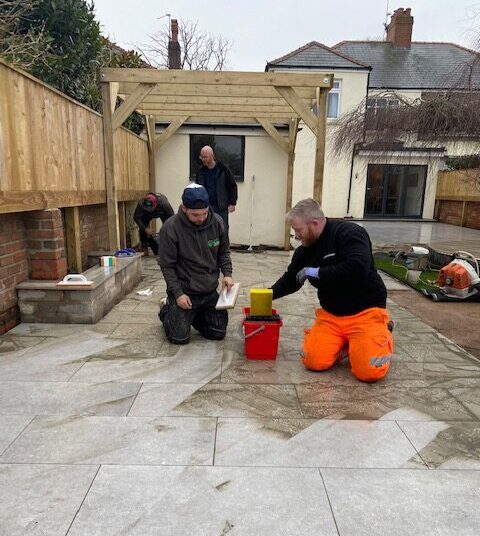
Step 4: Apply grout to the joints
After ensuring the area is still damp, immediately apply the Flowpoint grouting mixture to the joints.
Using a Neoprene rubber squeegee works best for manipulating the slurry and ensuring it gets into all the nooks and crannies (later on during clean-up, a Neoprene will also ensure the majority of the grout is removed off the surfaces of the slabs, making that process much easier).
Be aware that during outdoor temperatures of 20ºC, Flowpoint can set quickly – within just 15 minutes.
Continue to top-up the joints with more Flowpoint by moving it constantly back and forth over the joints to fill any areas where the mortar has sunk.
This is why a damp surface is required to ensure the slurry can be easily moved around.
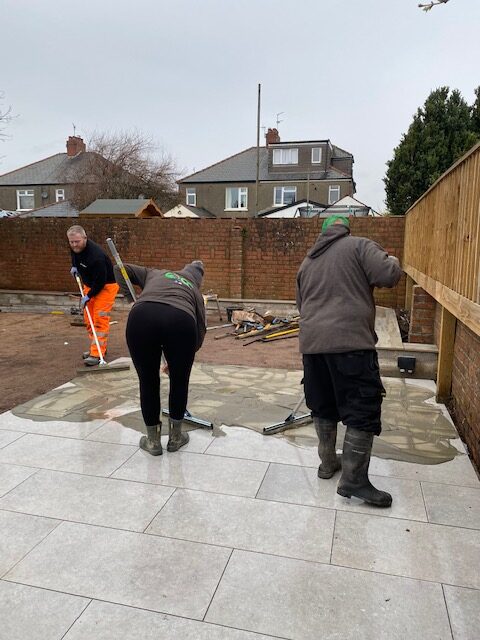
Still using the rubber squeegee, remove as much of the paving grout from the surfaces as you can.
Have a colleague or friend on hand to keep the area damp with the light spray of a hose. Again, never saturated – the area just needs to be kept constantly damp to prevent the grout hardening on the surfaces.
If any grout starts to harden on the surfaces, use a brush with a little water to help loosen it.
A fantastic time and energy saving tip to ease this process is to use a sponge machine like the Berta ADV, or a pedalo washboy. We’ll cover more on those later.
Step 5: The clean-off stage
Clean-off can happen once the mortar is touch-dry in the joints, and not a moment before.
This is usually after 30 minutes, but it does vary depending on the outdoor temperature. In warmer weather, Flowpoint will set much faster; in colder weather it will take a little longer to set.
Read our all-weather grouting article for specific tips based on what the weather is doing.
An easy way to gauge whether it’s time to clean-off the slurry is the thumb test.
Place your thumb lightly on the top of a filled joint. If your thumb leaves an imprint, then the grout residue is ready to remove.
Once ready, thoroughly clean the surfaces with water to ensure that no Flowpoint residue is left on the paving surfaces. Generally, a two-step clean is recommended: one to remove the bulk of the grout, and the next and final clean to remove any remaining grout residue.
Using a Neoprene squeege to clean the area will allow you to leave the fullest joints.
For extra speedy cleaning, use a Pedalo bucket with a sponge float or, ideally, a Berta Sponge Machine. Read on for more details and hiring options.
A pressure washer can be used, but you must always make sure you never point the washer into the paving joints themselves. This will aggravate the setting grout.
Any ponded water should be removed with a sponge or similar. Leave to fully cure.
Once the clean-off stage is complete, the pavers are ready to walk on after an hour and can receive car traffic after four hours (again, temperature dependent).
Recap of equipment needed
Now you know the full application instructions for Flowpoint, we’d just like to recap on the equipment you may need for the job.
One of the great things about using Flowpoint is that most equipment you need is part of every paving contractor’s toolkit.
The basic equipment you’ll need is:
- Large bucket for mixing
- Large measuring jug for adding the exact amount of water
- 110v paddle mixer
- Jet washer or hose pipe with a spray nozzle
- Rubber squeegee with a long pole – ideally a Neoprene squeegee for superior grout application and removal
- Small trowel for application
- Rubber float to remove grout from awkward areas
- Sponge for cleaning around the edges
Applying slurry grout can be a messy job, so also come equipped with a pair of wellies. A small paint brush will come in handy for cleaning tools afterwards.
Recommended extras for slurry grouting
Landscaping experts who have been working with Flowpoint for years also recommend additional equipment. Although they are optional, using one of these will make the installation process much more efficient for you and your team.
#1 Berta Sponge Machine
By far the greatest time saving device for applying Flowpoint – and any slurry or epoxy-based grout for that matter – is the Berta Sponge Machine. With the Berta, you can clean-off slurry grout in just one pass.
Using an electric sponge machine not only saves time, you’ll also greatly improve the effectiveness of your clean-up operations, avoiding any nasty cement residues or efflorescence from developing.
A Berta cleans off grout at a rate of 100m2 per hour, making it possible for professional landscapers to lay, grout and finish large projects in just one day.
Another bonus is that it uses a third less water when compared with other methods of slurry grouting. That’s far fewer trips to fetch clean, usable water.
Jon Gerrish from Paved in Stone (covering Somerset & Wiltshire) shared, “I bought the Berta 14 months ago and it has definitely paid for itself. I guess after using it for paving around 300m2 it’s well worth the money and gives a return on investment.”
#2 A pedalo washboy
While the Berta is by far the easiest and most efficient way to clean off slurry grout, if you don’t want to make a big up-front investment (but remember, you can hire one), the Pedalo Washboy is certainly the next best option.
The large Pedalo Washboy kit consists of a 40-litre water tank and features an ergonomic design for upright working. Two adjacent rollers are connected to a pedal in the bucket. When pressure is applied to the pedal, the sponge is squeezed to remove excess grout and water.
Whereas traditional grout cleaning involved using a simple bucket and sponge, the washboy allows you to clean-off grout in just two passes.
Not as fast as the Berta, but it’s still a much quicker job than with a bucket and sponge!
How to get the most out of Flowpoint
#1 Ensure paving slabs are in full-contact with the mortar bed
Foundations are everything. For the best results with Flowpoint – or for any grout for that matter – you must lay paving materials on a full-contact mortar bed.
Eco-bed bedding mortar is part of Ultrascape’s BS7533 Paving Mortar System. When used with Flowpoint and Pro-Prime (see below), the system is robust enough to last up to 40 years.
#2 Use a quality primer on the underside of slabs
You may have already heard the saying: “It’s a crime not to prime!”
Regardless of which paving materials you’ve used, applying a quality primer to the underside of slabs will seriously secure those pavers in place so there’s no movement, and therefore no grout breakages.
Priming also reduces the risk of efflorescence developing as the pavers are securely fixed to the full-contact bed below them.
Pro-Prime slurry primer, again from the team at Ultrascape, is recommended for use with Flowpoint and forms part of the BS7533 Paving Mortar System.
Always apply primer at 2–3mm thickness to achieve a nice thick layer, and ensure it goes right to the edges of the underside of the paving slab. For effectiveness you want to achieve full cover.
Use a vacuum suction lifter like the Grabo Pro or Bull-e Grip if you’re worried about getting your fingers dirty!
What paving materials can Flowpoint be used with?
Flowpoint slurry grout can be used with most types of man-made and natural stone pavers regardless of their finish.
This includes, sandstone, Indian stone, slate, porcelain, limestone (not black limestone), granite setts, concrete slabs, block paving and clay pavers.
For porcelain paving we recommend using a smoother mix of Flowpoint – either Flowpoint Fine or Flowpoint Smooth. These two grades of Flowpoint have less visible aggregate. They are able to be used for much narrower joints and offer a more contemporary finish.
Flowpoint is not recommended for use with black limestone or other darker limestone paving as some oxidisation can occur. Find out which grouts can be used with black limestone.
Does paving need to be sealed when using Flowpoint?
Using a sealant is not essential with Flowpoint. You may consider applying one if you like the look of sealants. Or maybe you want some extra protection against long-term staining.
Sealants can be useful for creating a protective barrier from tree sap, chewing gum, moss, algae and other common stains. Using one makes stains easier to clean off. They are more-so important with porous paving materials such as sandstone or porcelain, and with man-made stone.
You can either apply the sealant onto your pavers before laying them, or wait for approximately three months to allow any efflorescence and minerals to escape.
Delaying sealing until later allows salts that are going to naturally escape through the paving slabs to do so first, rather than sealing them in.